Showing posts with label applique. Show all posts

Saturday, 2 March 2013

Little House

I have been working a little project for the past couple of months in the construction of 'A Little House' 
each member of Fife branch Embroiderers Guild is making one for a future exhibition.
you may have read this post 'Little Stitches'where I posted some little glimpses of the pieces I was working on. This is it finally finished after much arranging and rearranging, sometimes you put things together and they look great for a while then the more you look ....they don't work any more when a better idea comes into play. I'm happy with the end result now ....
 front and side
Copper ring window surrounded with cast on stitches 

french knot roses

stump-work velvet window frame

little door
extending a little fragment


 back and side
Wisteria detail using isolated drizzle stitches on stump-work branches
working on the A-Z stitch tags has brought some new and varied stitches to my attention, this project has enabled me to develop them further so I feel doing the tags has been really worthwhile

 back view 
You can see also the laced up side closure on the right.
The transferred image is of a photograph of a real window from a derelict house from the Highland clearances the date plaque coincides with the period also.
my little spider and web I stitched at Halloween found a home!
as well as the Queen Ann's Lace.
This is the roof ....
strips of fabric, yarn and rick-rack, a paper butterfly and a vintage china cabinet key attached with some pink silk ribbon.
I have photographed it on top of my flower quilt you may remember my posts on that.....here
Retrieved from my workshop, I'm determined to work to get that completed, its been sitting unfinished for too long..... hopefully I'll get back on it soon.

Oh almost forgot my little house is called 'Blue Lace Cottage'

Friday, 28 September 2012

Comments, Patchwork and Prayer Flags

As I sat down at my laptop this morning, with little C packed off to nursery for the morning I had full intentions of going out to my little studio to find another unfinished project to get on with. That was until I read the lovely comments about the cake I made for my aunt, thank you so much, all of you! but I can't take credit for the design I saw the idea for the icing effect here on pinterest and pinned it sometime ago to remind me the next time I needed a simple icing idea for my favourite Victoria sponge recipe. 
 I'm so glad I clicked on the link to Jan's blog and saw and read about lovely prayer flags that she and others are making, I was lost on a journey reading all about them and I want to make some now! 
 This is my little mini quilt which I finally finished the binding on last night. I put it away after completing the applique some time ago and blogged about here.
 I decided I would make it in to a wall hanging and perhaps display it in my little caravan.
I have been meaning to make bunting for my little caravan too but perhaps a string of prayer flags would be nicer and more meaningful.
Have a lovely day, its raining and windy here,I hope your weather is better x

Monday, 23 April 2012

Flower Power & Birthdays

Talking of flowers, my sister Theresa is having a hippy party to celebrate her 60th birthday next week, everyone is getting organised with hippy clothes, gathering accessories etc. among other things,  I have been working on a little top for Charlotte. Not one I made myself, in fact it was a sale purchase from the supermarket, the cute embroidery on the front sold it to me for £3


 I bought it over a year ago and she didn't really get a lot of wear out of it because it got too short length wise before she outgrew it, it occurred to me last week that the top actually still fits her, except it's too short. so I cut the bottom from another t-shirt from the quilt/rug pile and came up with this.

I didn't get a picture of the pink top on its own before I added the green bit but I'm sure it's easy to see what it looked like before I added the green bit.
I just stitched this by hand, tshirt fabric is great for this kind of thing as it doesn't fray.

I did one line of running stitch in 3 strands of pale blue embroidery thread along the very bottom of the pink top, then another with pink in a wavy line further up to join the pieces together, then another in green using french knots.


in the back I just did a straight line across and added a little heart applique,
 to match the one I did on the front with a blanket stitch in pink around the edge.
The one on the front is covering a transfer image that was already there, I thought the batik fabric would give it a more 'hippy' look.

Still needing something else to blend the two fabrics together

 I thought I might add a flower, and give the steam a seem another go,
 it worked a much better on the cotton tshirt fabric but I'm still not convinced I need two paper backings on a bonding product, anyway backing papers removed,

I placed it on top and ironed.


I then machine stitched round the edge a couple of times


with fuchsia pink embroidery thread


and added a little bead detail to the heart on the front, with hex glass beads
they have a very sparkly iridescent coating on them


I'm quite pleased with how it looks now


It's my older daughter, Aprils 20th birthday today :)
So that means its cake time


Victoria sandwich filled with lemon curd & lemon mousse
topped with lemon butter icing, more lemon curd and
sprinkled with lemon rind.

~ Happy Birthday April ~
XXX

Thursday, 20 October 2011

Black & White

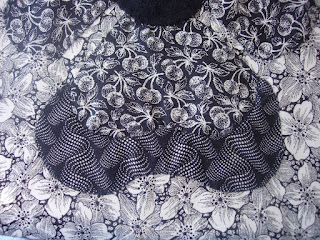
I spent most of my creative time this week working on my Black & White quilt.
I used black poly velvet in strips between the squares and around the edge.

Side 1

I'm quite pleased with how it has turned out so far......
its not finished though......I hope to work on each of the squares to hand quilt around the flowers but that can be done as and when the mood takes me :)

Side 2

Now it sits on my sofa and I can cuddle under it in the winter evenings.

Just in time it seems as I think I'm coming down with a head cold and in need of a little comfort :(
sniff sniff

on another black and white note this is a little Zebra I bought last year for Charlotte's Christmas, she has now outgrown it
 (catching her toes under it on Monday while trying to have a go! :( poor wee thing)


Hes a lovely little wooden rocker, I bought him from a lovely seller on EBay.
now he needs a new home.

cute isn't he!
I was always going to fill the name in


but never got around to it. It kinda suits him anyway
So Clark is heading on to gumtree to find a new home, and
yesterday Charlotte and I went for a drive to collect a new rocker


needless to say shes delighted with him! she can just about climb up all by herself and as you can see, has had lots of fun already..... thanks to Gumtree, my favourite place at the moment.
The best thing about it is, it's free to list and sell, meaning the sellers gets to keep 100% Thats good for everyone :) I know its been around for a while now but I think its growing and more people are using it everyday worth a look for those who like a bargain.

Saturday, 21 May 2011

Rose of Sharon Quilt

Firstly I want to show you this picture of the Rose of Sharon quilt my sister Theresa and I worked on for her daughter Adele. It's a double bed size completed in 1994.

As I wrote previously, I'm now working on a black and white one, a smaller version, for my sofa, a square one with 4 blocks each side.

After I posted about the problems I was having with the grey fabric, I read Anne's post about using freezer paper for applique I thought that it looked like a much better way so I gave it go.
If your read her post the shape is first cut out of freezer paper this is then ironed onto the right side of the fabric, however....I didn't have any freezer paper but the outline of each shape was already drawn on the back of each of the cotton pieces so I thought I would give it a go with the glue

you can see the coloured glue along the snipped edge up to the line.

edge folded over with the use of a cocktail stick

the finished piece already to sew on.
This worked fine I thought but I decided to get the freezer paper to try it out on the bigger bits to see if it would give me a smother rounded edge and to try it on the grey fabric.

The freezer paper method worked great on the cotton fabric but not the grey, it wouldn't stick with the glue, the folded cut edges kept jumping back up and it also melts too easy with the iron....as I found out on my trial piece, so after about 30 mins trying to get the edges to stay stuck under, I melted the whole lot with the iron!!!! grrrr.....I didn't keep, I popped it in the bin, decided not to let it annoy..... it sorry no pic.

However I'm still delighted to use this new method for all the other pieces and have found the sewing machine method of backing the grey pieces and turning right sides out is the best way forward here.

I have now competed the first two blocks for the second side.
The glue method gives a much neater finish and I find the pieces a lot easier and quicker to stitch on.


Not the best picture I have to say but I took it this evening in artificial light.
I'll get a better picture tomorrow of these and all the other 4 completed for the other side of the quilt.

Monday, 9 May 2011

Baby Bunting

Baby Bunting for Joshua


Back


All in a row ......


In bright sunny colours!


Thursday, 24 March 2011

WIP applique

A close up of the leaf section of the ROS quilt
This is one of the first ones I stitched on, they can bequite fidley to do because of the fabric I have chosen. It's a rayon type fabric that freys easily but it has a lovely sheen on it and is hardwearing.
I decided against bondaweb after it left glue marks on the fabric and made it quite stiff, ok for wall hangings but not for a lap quilt, I want if to drape nicely and feel soft.

Theresa suggested that I use a different method for these pieces, she showed me some applique pieces she had bought from USA which had been backed , this made them easy to sew on and took the frayed edge problem away.  I wasn't keen at first but after stitching another couple on, I decided I would try this other method. I don't know if it has a name,  if you know of it and can tell me what its call do let me know.

You could do it by hand but I decided to use my machine


The fabric is pinned right sides together with a thin backing fabric,  and the outline of the shape is drawn onto the backing fabric.
The outline is then stitched on the machine, leaving an opening somewhere


the piece is then cut out and trimmed close to the stitch line turned inside out, ironed flat then stitched in place. Here is a picture of how it looks.

It's not as flat as the other one but still looks good, and I think it will be more durable.
I have to say it was so much easier to stitch down, although some might think this is cheating.....

I decided to try this method with the outer petal section and took more pictures to show you.
As these shapes had already been cut out and marked with the outline on the back, I place these right side down onto the backing fabric and stitched on top of the outline


Cut them out and sniped across the corners 


turned them inside out..........


I used this ball end tool to help me get into the corners
and ironed them flat.


it was more difficult stitching these into place and some puckering occurred on the inner petal piece as you can see in the next picture......


but I was able to straighten most of it out when I stitched along the other side


this puckering is mainly due to the fact that the inner petal pieces were not a more uniform shape as they were stitched on the using a different method......hope I'm making sense here

I think if this method was used for the inner petal pieces also then they would all fit nicely together.

Although this method, does take more time preparing the pieces and involves using the sewing machine, its quite straightforward and I think once you have the pieces it's still enjoyable to sit and hand stitch them in place, what you don't get is the fiddly fraying edges popping out and I'm not having to find the outline all the time.


I will decide at the end of this forth block whether I will carry on with this method for all the shapes on the blocks on the other side, or to revert back to just using it for the grey leaf sections where it worked well.
Its been so long since we worked on Adeles quilt I forget how I stitched them.

LinkWithin

Related Posts Plugin for WordPress, Blogger...