Showing posts with label Patchwork quilt. Show all posts

Tuesday, 16 September 2014

Shirt Quilt number 2

Still had lots of pieces of shirt fabric left from quilt number 1 
So I decided to make another, this time to save on time I cut all the pieces the same size 15 cm square but made it up in 3x3 block squares, the same as quilt number 1, adding the fleece backing and quilting as I went along before joining up all the pieces.

I was aiming to have this complete to take with us on out summer caravan holiday to North Wales but the backing fabric I had bought in haste a few days before our departure proved to be unsuitable and the project had to be set aside until the right fabric for the job had been found.

On a trip to the local Sunday market in Pewhelli the day after we arrived in Wales we cam across a fab fabric stall with a lovely selection of designer prints on offer and there was the perfect fabric. 

it was a perfect weight and thickness to do the job. 
We take quilts away in the caravan as they are great for snuggling under and for padding out the seat cushions under the sheets when making up the beds.


This one is for my husband Kevin.

so now I must get back to finishing Charlottes memory quilt.

Tuesday, 25 March 2014

Shirt Quilt

I loved quilt pattern in issue 14 of Homemaker magazine 

and decided to make one for my son Harry using shirts. 


Backing fabric is one piece

 all backed with fleece blanket 


All from a pile of shirts and a fleece throw
I'm delighted with result. 
The quilt took about 21 hrs total to complete. 

Saturday, 21 April 2012

Opening up the past

The 'challenge' this month has literally been to actually 'open' my sketchbook

First I opened a little A6 sketchbook from the past when I was at college all those years ago in the Borders when I made the 'Flower Quilt' The annotation beside the little watercolour flowers mentions applique as a proposed idea, I was reminded also that the six watercolour panels that I made were actually the second idea, the first being a single panel which I did make. I wasn't happy with it, mainly because I chose peach for the background fabric. I used a dip-dye method, I enjoyed the process but the end result didn't seem a good fit for the quilt so I didn't use it. I'm sure I must have this, probably in my portfolio with all the paintings and drawings, I will have to look it out.


 I remember now that worked on the six smaller panels during the summer break.


I have been working on the pieced border that I removed from the quilt
 separating all the squares, unpicking and removing all the stray threads.


I opened my sketchbook and again did some sketching then watercolour painting
 inspired again by the fabrics.


I'm thinking that it might be nice to make more panels for the back of the quilt using the same process I did back then after all I do have a lovely new set of the same watercolour dyes I used, actually this quilt was the reason I bought them the first time round.

Looks like my mend and reduce job is turning into another project.

Wednesday, 11 April 2012

My first quilt ~ makover

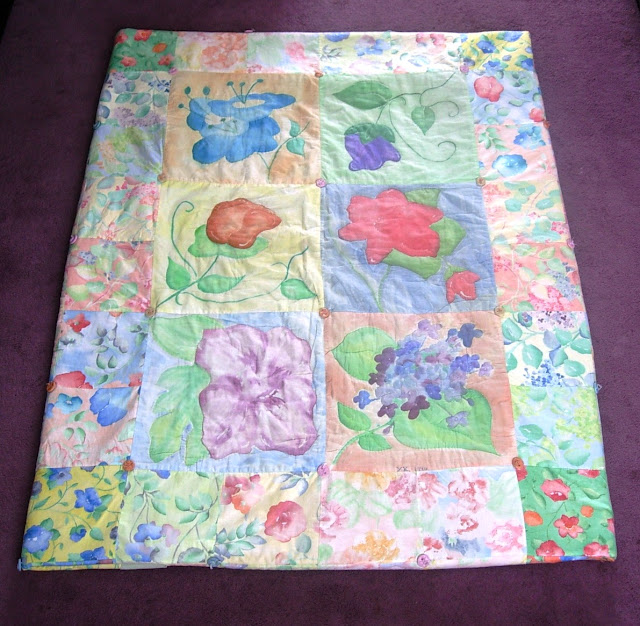
This is my first quilt.
I am only now getting around to photographing it.
(digital makes things like this so much easier now)

It was completed in 1996

(my initials back then)
 Although I had already started 2 other hand pieced quilts
 ( blogged  here)  but these were both far away from being finished quilts.
This quilt was a college project and was inspired by a sample book from the Fabric Guild, picked up for a couple of pounds from a fabric and curtain store near the college I attended in Hawick .
The sample fabric pieces were large squares each of which I cut into four smaller squares and used in the quilt around the edge, in total there are 14 of these large blocks of 4.

The six centre blocks are my own fabric designs inspired by the sample book.
I used batik method and watercolour dyes to paint each flower panel.
The whole quilt measures 67 x 81 inches.
Big enough to top a double size bed.

I used a simple tied method for a quick quilt using my own handmade buttons, always meaning at some point to quilt it, but that would have to be by hand
as its too big and heavy to attempt  with my machine.
It has seen a lot of occasional use and is in need of some repair

and a good clean.
The problem is its too big and heavy for my own washing machine.
There is quite a heavy blanket inside, great for warmth but not for keeping clean.
I have almost taken it to the cleaners a few times, but not keen to do this for a few reasons.
I decided to start on the repair work yesterday.
I'm now having ideas of changing the size of the quilt to make it slightly smaller,
 removing a line of blocks, perhaps adding them to the back of the quilt,
which at the moment is plain old green sheet.
I'm thinking something this size might be better.
This is just folded over to give an idea of how it would look, showing just one line of squares surrounding the centre blocks.
This would reduce it to a more manageable 45 x 60 inches, perhaps I could add a 4 inch border
the removed patches could go on the back around the edge or in the middle.
I'm also thinking I might replace the blanket for a fleece one to make it lighter and machine washable.
I might also try quilting it.

 I made a start by removing the buttons and the green backing.

 bit of a messy job !
 I just love all the colours in the fabrics

Now that have these strips of squares all washed and ironed,
I'm thinking I might cut them into smaller pieces and make a more interesting back to the quilt.
I still have some of the plain coloured pieces of fabric that came out of the sample book, I will have to have a look them out, I might be able to combine them in some way.


I'll have to think about it a bit more,
any suggestions /pattern ideas are most welcome.

Thursday, 20 October 2011

Black & White

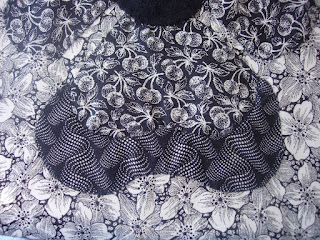
I spent most of my creative time this week working on my Black & White quilt.
I used black poly velvet in strips between the squares and around the edge.

Side 1

I'm quite pleased with how it has turned out so far......
its not finished though......I hope to work on each of the squares to hand quilt around the flowers but that can be done as and when the mood takes me :)

Side 2

Now it sits on my sofa and I can cuddle under it in the winter evenings.

Just in time it seems as I think I'm coming down with a head cold and in need of a little comfort :(
sniff sniff

on another black and white note this is a little Zebra I bought last year for Charlotte's Christmas, she has now outgrown it
 (catching her toes under it on Monday while trying to have a go! :( poor wee thing)


Hes a lovely little wooden rocker, I bought him from a lovely seller on EBay.
now he needs a new home.

cute isn't he!
I was always going to fill the name in


but never got around to it. It kinda suits him anyway
So Clark is heading on to gumtree to find a new home, and
yesterday Charlotte and I went for a drive to collect a new rocker


needless to say shes delighted with him! she can just about climb up all by herself and as you can see, has had lots of fun already..... thanks to Gumtree, my favourite place at the moment.
The best thing about it is, it's free to list and sell, meaning the sellers gets to keep 100% Thats good for everyone :) I know its been around for a while now but I think its growing and more people are using it everyday worth a look for those who like a bargain.

Thursday, 24 March 2011

WIP applique

A close up of the leaf section of the ROS quilt
This is one of the first ones I stitched on, they can bequite fidley to do because of the fabric I have chosen. It's a rayon type fabric that freys easily but it has a lovely sheen on it and is hardwearing.
I decided against bondaweb after it left glue marks on the fabric and made it quite stiff, ok for wall hangings but not for a lap quilt, I want if to drape nicely and feel soft.

Theresa suggested that I use a different method for these pieces, she showed me some applique pieces she had bought from USA which had been backed , this made them easy to sew on and took the frayed edge problem away.  I wasn't keen at first but after stitching another couple on, I decided I would try this other method. I don't know if it has a name,  if you know of it and can tell me what its call do let me know.

You could do it by hand but I decided to use my machine


The fabric is pinned right sides together with a thin backing fabric,  and the outline of the shape is drawn onto the backing fabric.
The outline is then stitched on the machine, leaving an opening somewhere


the piece is then cut out and trimmed close to the stitch line turned inside out, ironed flat then stitched in place. Here is a picture of how it looks.

It's not as flat as the other one but still looks good, and I think it will be more durable.
I have to say it was so much easier to stitch down, although some might think this is cheating.....

I decided to try this method with the outer petal section and took more pictures to show you.
As these shapes had already been cut out and marked with the outline on the back, I place these right side down onto the backing fabric and stitched on top of the outline


Cut them out and sniped across the corners 


turned them inside out..........


I used this ball end tool to help me get into the corners
and ironed them flat.


it was more difficult stitching these into place and some puckering occurred on the inner petal piece as you can see in the next picture......


but I was able to straighten most of it out when I stitched along the other side


this puckering is mainly due to the fact that the inner petal pieces were not a more uniform shape as they were stitched on the using a different method......hope I'm making sense here

I think if this method was used for the inner petal pieces also then they would all fit nicely together.

Although this method, does take more time preparing the pieces and involves using the sewing machine, its quite straightforward and I think once you have the pieces it's still enjoyable to sit and hand stitch them in place, what you don't get is the fiddly fraying edges popping out and I'm not having to find the outline all the time.


I will decide at the end of this forth block whether I will carry on with this method for all the shapes on the blocks on the other side, or to revert back to just using it for the grey leaf sections where it worked well.
Its been so long since we worked on Adeles quilt I forget how I stitched them.

LinkWithin

Related Posts Plugin for WordPress, Blogger...